
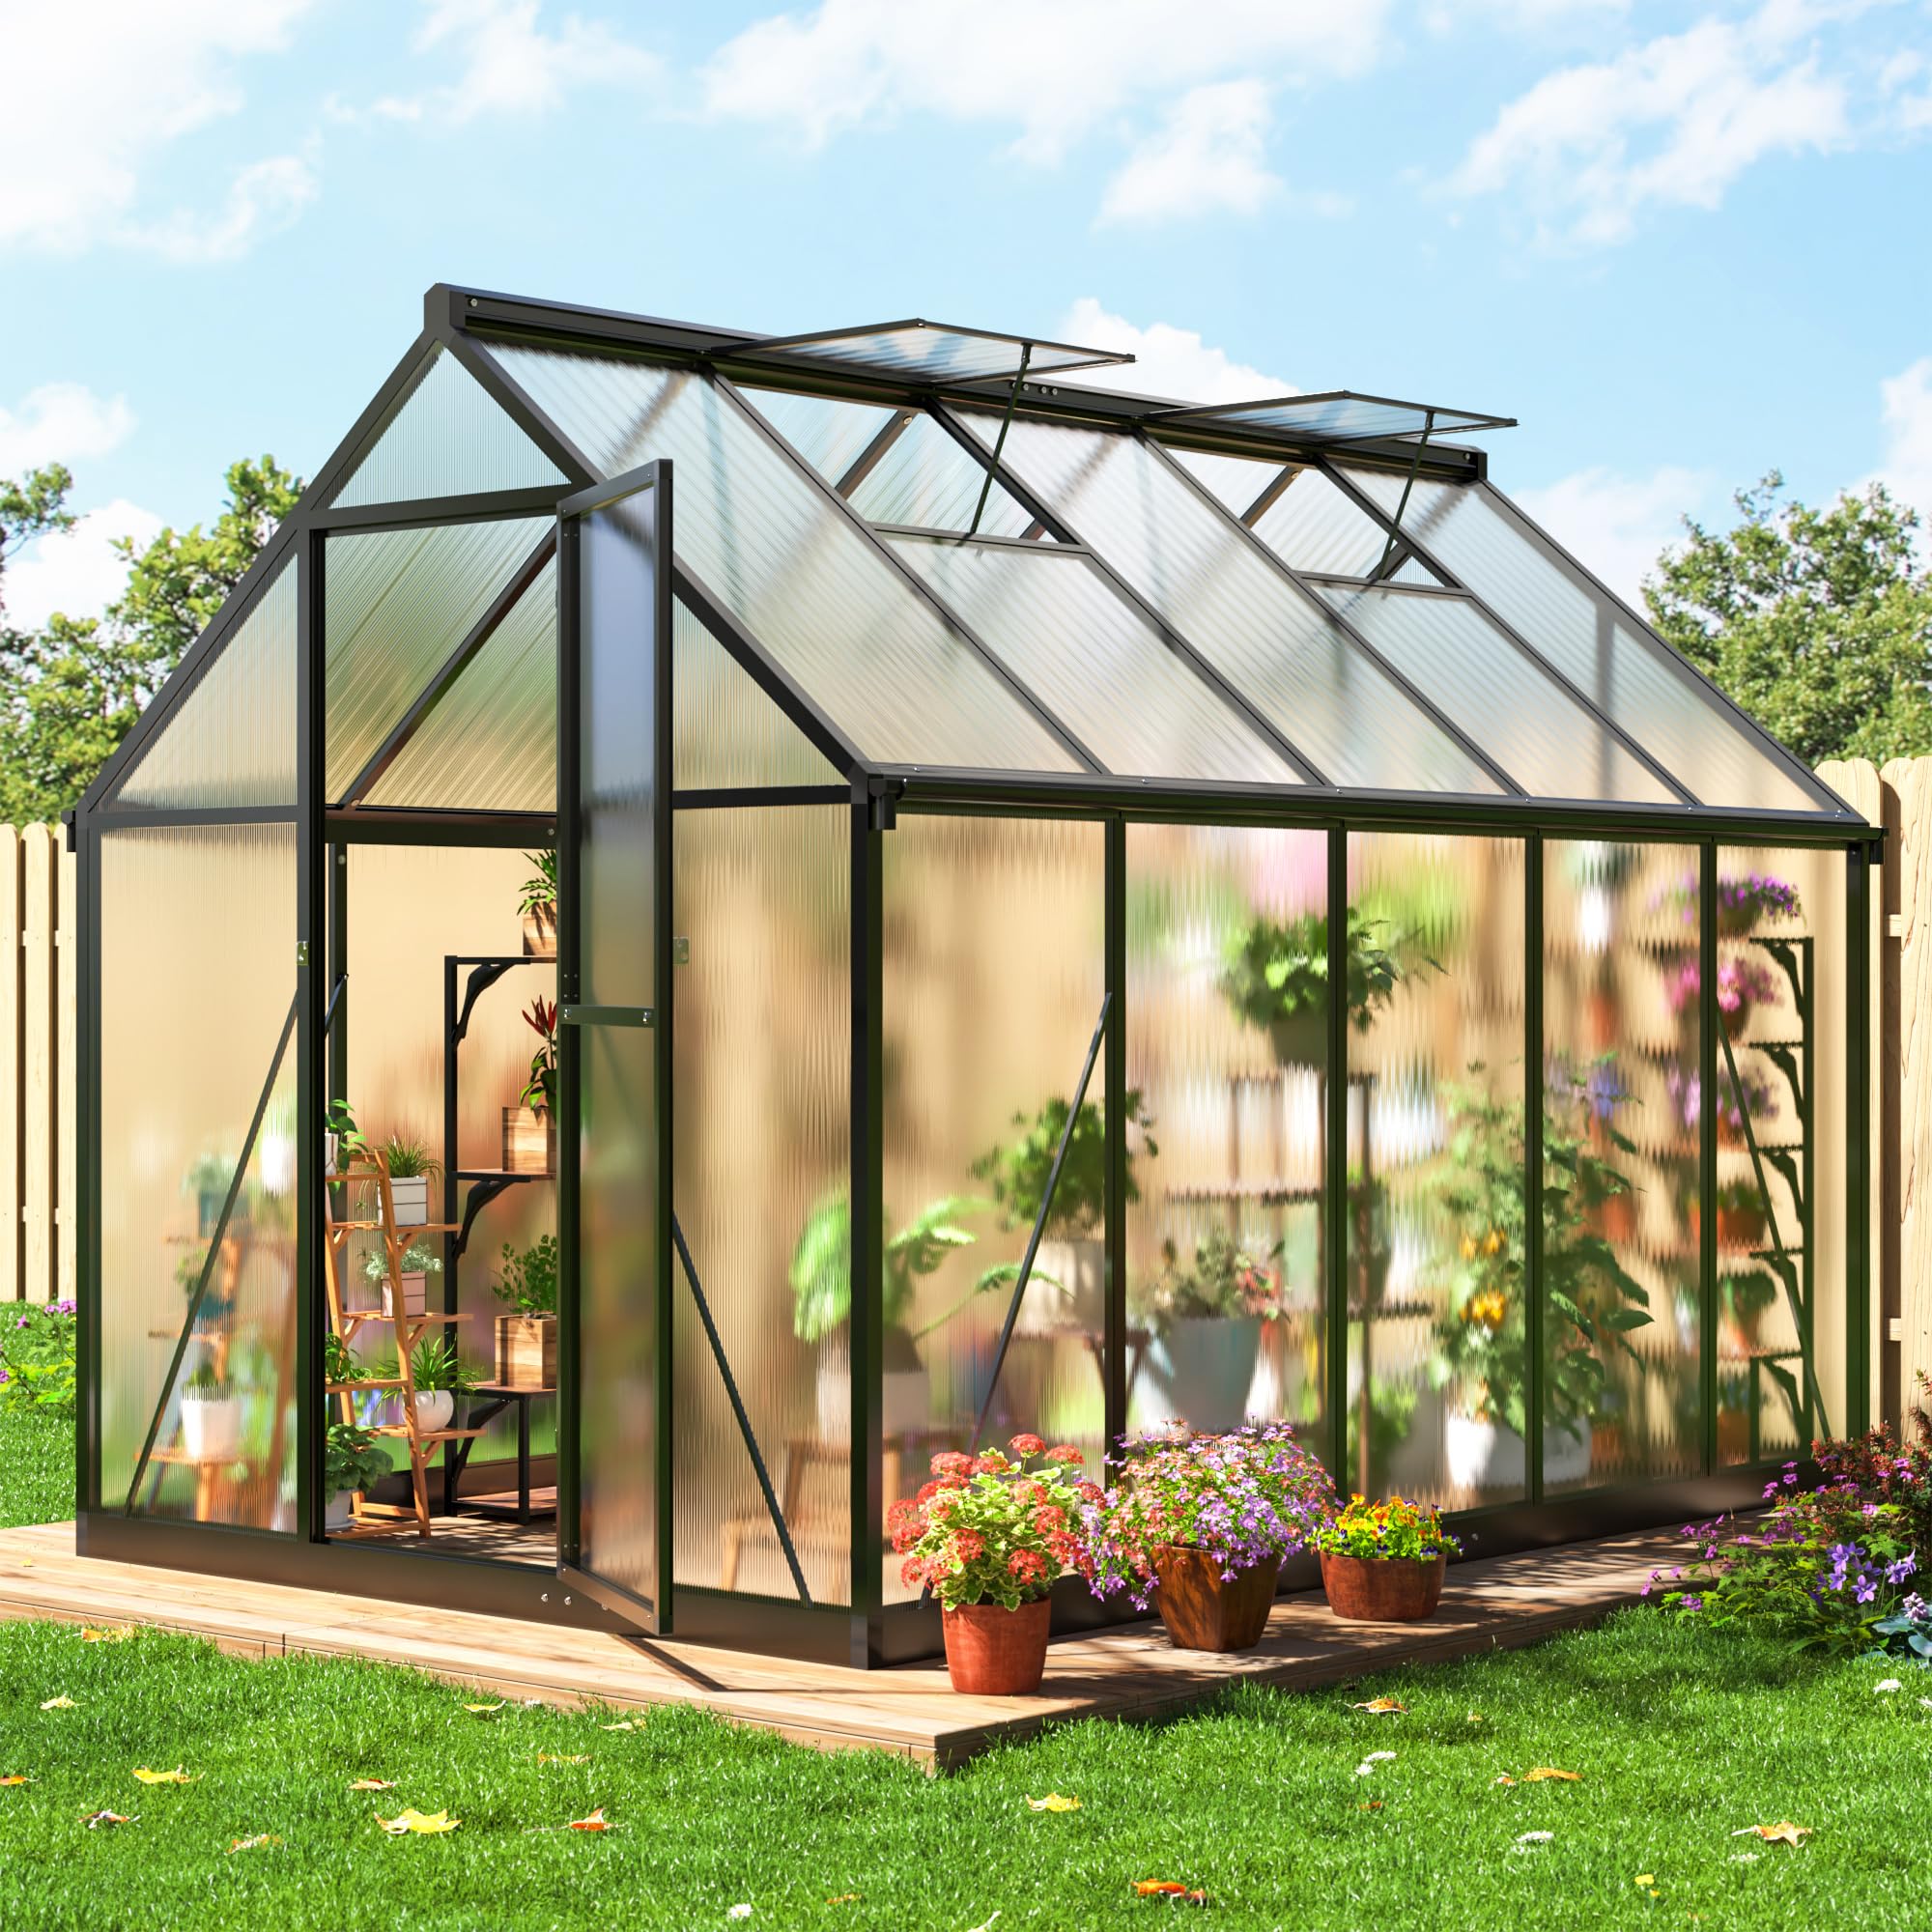


🌱 Cultivate Your Green Oasis with Ease!
The 6x9 FT Greenhouse is a robust outdoor structure designed for easy assembly and optimal plant protection. Featuring heavy-duty polycarbonate panels and a reinforced aluminum frame, it offers durability and year-round use. With UV protection, adjustable ventilation, and a secure design, this greenhouse is perfect for any gardening enthusiast looking to enhance their outdoor space.


A**N
Good quality; instructions were a bit hard to follow
We are very impressed with the quality of the greenhouse! It is very sturdy and has good insulation. It definitely is a two person job to assemble, but once you have a grasp on how to interpret the instructions it goes fairly smoothly. It has already survived a couple of windstorms with no damage. Here’s a couple things that will make it last longer/work better:-peel the covering off the panels before you assemble it-anchor it securely to the ground-seal the panels/gutters with a clear silicone caulk. This will help with insulation, as well as keep the panels more securely in place.-line the base with a tarp, and then cover said tarp with gravel/pavers. This will help with ground insulation and also make it look more put togetherA few other things to note--It will take a bit of muscling to get some pieces to line up-some of the parts had dents, but they were easy to correct-it did take quite a bit of effort to understand the instructions initially-it is a bit short, so be mindful of this when assembling/placing your plants and shelves-it came in two boxes, and they arrived a couple days apart from each otherAll in all, we are very happy with it! I’ll update this review in 6months to a year.
H**R
Perfect for what I needed
Would have given 5 stars, but the instructions were a bit confusing.The window latch is directional, so if you do it backwards it won't latch, but without an extra screw or nail, it won't stay open (I used a long bolt and wing nut)Go the extra mile, and make a platform for it, I used some sturdy pallets, and plywood. The posts incuded for the footing in the ground, I turned them sideways, and bolted them into the platform I built, a simple 2x4 was the perfect height to fill the gap. I also used some double sided gorilla tape at the base of the top panels to prevent them from moving in high winds.Overall, I wish this was taller, im 5'10" and I need to bend to go through the doorway.
B**A
very thoughtfully designed
Overall I think this kit for an 8x10 greenhouse is very thoughtfully designed (and insulates well). As a petite woman who has assembled a lot of furniture, I think a lot of the assembly is doable by just one person. A second pair of hands helped tremendously with the roof (otherwise I would have been taping the pieces in place like a different reviewer mentioned), and a second mind helped figure out what to do when the instructions weren't clear. If it holds up for a few years, it will be worth the time, effort and expense. The company was very responsive when I messaged them through Amazon. (The e-mail on the front of the instruction manual was not as efficient.)Tips:I read the reviews before starting and knew to peel off the protective film on both sides of the panels. I also took the advice of laying out all the parts in an organized fashion. I wholeheartedly agree with the reviewer who emphasizes the importance of a good base. As other people noted, the foundation seems to take the longest amount of time but it is well worth it to make the rest of the assembly easier.In my opinion, there are a few steps that are difficult to understand. Here are my tips after the fact:Step 3: I think the idea is that you can choose to stake the greenhouse of dig a trench for it? I ended up drilling/sawing slots into a wooden foundation.Step 39: the B3 panels do not insert fully into the frame. This was a step that stumped me because the other panels up to this point all sit within the frame. I thought the B3 panels were too long and almost made the mistake of trimming them to fit within the frame. That would have been a disaster. The tops of the B3 panels are free-floating until the gutters are attached.Step 47: do not insert the H19 rod into 2 free floating gutter pieces (A21). Just insert it into one side, then after attaching both the gutter halves, slide it across. I broke the plastic of one gutter piece because I tried to connect the two before they were stabilized on the frame.Step 57: The A23 pieces will seem to not fit if the base is not level, even if the rest of the greenhouse is holding together without a problem. Get the base level and the A23 pieces will be exactly the right length.Step 58: the plastic H21 is to cover the exposed A25 and A26 metal pieces. The plastic has to be trimmed to fit.My only issue is that for some reason, I cannot get the drilled holes of the H4 pieces to align. I don't know what I am doing wrong because the door is otherwise fine. The company was very responsive in sending me new H4 pieces, but the problem remains even with the new pieces so I'm at a loss what to do. I can't imagine it's the company's fault, but at the same time, I really don't know how else to position the pieces to fit the holes drilled on the frame. For now I am relying on duct tape to hold the corner pieces on the frame.P.S. The H17 pieces are a clever way to allow access through the ventilation openings during the assembly process (sliding the ventilation panes up and down and poking your head out) while making sure the panes don't slide after assembly once you tighten them in place.
Trustpilot
2 days ago
4 days ago

